24p inside 60i with pulldown
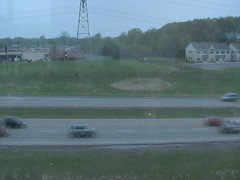
This happens on TV a lot so you may not even notice this with your HDV.
24p with pulldown removed
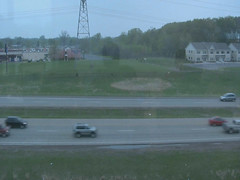
You would pretty much have to be using a computer or some progressive display to notice the difference.
Introduction
Hi there! You're probably reading this because you want to convert your Canon HV20 (or whatever with 24F/P in 60i) footage to true progressive format prior to editing. Whew. Let me begin by saying not everyone needs to do this. If you're adding lots of special effects and resizing your output to a smaller HD (eg. 1280x720) it may matter because of "combing". Or simply because you like to see your frames individually as clear as possible. Maybe you are a film enthusiast and your final output needs to be its progressive best. Doing Inverse Telecine/Pulldown Removal (we'll call it IVTC now) will not compensate for bad video. It just removes the blur/ghost produced by that one interlaced frame every few seconds. Most people will not even notice. I barely notice it.
This IVTC process won't save you hard drive space because you need to generate large files with a lossless codec if you really want to preserve the bit-by-bit look. If you compress with WMV9 or XViD you're doing lossy editing which may lose more detail if you add in text effects or overlays. It's up to you. Maybe your audience won't notice. Call it an artistic device!
Anyway, you can still work with your raw m2t or dvr-ms to produce fantastic looking output. DVR-MS used by Windows Movie Maker is stored with WMV9 compression. That format does not allow interlace therefore it is automatically deinterlaced for you! If you just need something simple to share with friends and relatives you can recompress to WMV. Even Mac users should have a codec to read those! As for Linux, they can figure it out.
This process is technically involved. The open source software hasn't been glued together enough to be easy to use. Get one thing wrong and it may not work at all. If you have no patience for this, stick with Microsoft's Movie Maker or stay with interlace. If you need to do this for a living then go spend the extra cash to buy Cineform's software. They cost a pretty penny but they simplify this process and do some extra high end stuff.
Have I knocked some sense into you? No? Oh well, then read on.
The Farnsworth plus Sillyman Process
Forgive me Farnsworth, whoever you really are, for I am about to immortalize your name with your own process. His original process is posted here. He listed down the tools you needed. They are all free, from extracting the m2t to performing IVTC and then rendering to an intermediate edit format. The only non-free part is where you actually start using an NLE. Unless you're using VirtualDub/Windows Movie Maker you probably had to buy an HDV capable editor.
Here's an overview of the workflow with the improvements I've made:
1) Extract m2t using HDVSplit (NLEs like Vegas can do this too)
2) Run DGIndex and fixavs.pl via go.bat to identify the progressive and interlaced frames and save it to a d2v file. Generate an MPA file for audio to go with it. Create an Avisynth (AVS) file with instructions to use the d2v and mpa with the correct audio delay.
3) Load the AVS file into VirtualDubMod and select your compression format. Then Save As to an AVI file.
4) Load your new AVI file to your choice of NLE for editing. Then render to your desired format.
5) Delete or archive the source files that you no longer need.
Getting Step 1-3 To Work
We'll only cover Steps 1 to 3 in this process. 4 to 5 is all yours.
A) Download the Software
ActivePERL 5.8
HDVSplit 0.77 Beta
VirtualDubMod 1.5.10.2 All inclusive
Avisynth 2.57
DGIndex 1.49 RC2
TIVTC v1.01 plugin ~search TIVTC
MPASource plugin ~search MPASource
MSU Lossless Codec
Lagarith 1.312 Codec
Huffyuv 2.2.0 Codec
Farnsworth plus Sillyman 24p scripts
B) Install HDVSplit 0.77 Beta (you don't have to if your NLE already makes m2t with scene splitting)
C) Create a directory called 24p (anywhere you'd like)
D) Decompress VirtualDubMod 1.5.102 into that 24p directory.
E) Decompress dgmpgdec149rc2.zip into that 24p directory; RENAME IT to dgindex
F) Go to the dgindex directory and look for DGDecode.dll; COPY THAT to c:\Program Files\Avisynth 2.5\plugins
G) Open TIVTCv101.zip and COPY the TIVTC.dll to c:\Program Files\Avisynth 2.5\plugins
H) Open mpasource_25_dll_20040109.zip and COPY mpasource.dll to c:\Program Files\Avisynth 2.5\plugins
I) Right-click msu-ls-codec.exe and Run as Administrator (For Vista -- XP you can run as normal) and follow the prompts to install
J) Decompress Lagarith_1312.zip and RIGHT-CLICK INSTALL lagrith.inf; you can delete the decompressed files aftewards
K) Decompress Huffyuv 2.2.0 and RIGHT-CLICK INSTALL huffyuv.inf; you can delete the decompressed files afterwards
L) COPY the go.bat, template.avs, and fixavsdelay.pl into the 24p directory
M) Double click on the activeperlxxx.msi file to install and follow the default options
Your 24p directory should look something like this:
D:\Capture\24p>dir
 Volume in drive D is DATA

 Directory of D:\Capture\24p

05/12/2007  08:48 AM    DIR          .
05/12/2007  08:48 AM    DIR          ..
05/11/2007  07:01 PM    DIR          dgindex
05/12/2007  07:03 AM             1,526 fixavsdelay.pl
05/11/2007  10:55 PM               173 go.bat
05/12/2007  08:48 AM             5,576 README-YouSillyMan.txt
05/11/2007  10:57 PM               117 template.avs
05/09/2007  09:35 AM    DIR          VirtualDubMod_1_5_10_2_All_inclusive
Your plugins directory should look something like this:
C:\Program Files\AviSynth 2.5\plugins>dir
 Volume in drive C is OS

 Directory of C:\Program Files\AviSynth 2.5\plugins

05/11/2007  07:07 PM    DIR          .
05/11/2007  07:07 PM    DIR          ..
07/05/2005  08:04 AM             7,129 colors_rgb.avsi
05/07/2007  10:53 PM           192,512 DGDecode.dll
12/24/2006  05:12 AM            24,576 DirectShowSource.dll
01/09/2004  08:55 PM           135,168 mpasource.dll
12/24/2006  05:12 AM           112,640 TCPDeliver.dll
02/19/2007  05:52 PM           456,192 TIVTC.dll
How To Use The Script
A) Run HDVSplit to extract all your m2t scenes (in this example we'll assume D:\Capture)
B) Start -> cmd , this will launch a command shell
C) Go to your 24p directory where go.bat is found (in this example we'll assume D:\Capture\24p)
D) in the command shell type "go D:\capture" -- USE ABSOLUTE PATHS; DGindex will launch once per m2t file
Sample filenames generated:
05/08/2007  06:11 PM        35,451,392 CaptureTemp_0023.m2t
05/12/2007  09:01 AM           492,626 CaptureTemp_0023.m2t_ MPA PID 814 DELAY -236ms.mpa
05/12/2007  09:01 AM               208 CaptureTemp_0023.m2t_.avs
05/12/2007  09:01 AM             1,800 CaptureTemp_0023.m2t_.d2v
05/12/2007  09:01 AM               214 CaptureTemp_0023.m2t_fixedaudio.avs
E) There will be two sets on avs file for each m2t. You want the one that says xxxx_fixedaudio.avs
F) Run VirtualDubMod and drag the xxxx_fixedaudio.avs into the open window
G) Video -> Compression (pick a lossless one like LSU or whatever you like)
F) File -> Save As (you can use fast recompress since or full processing, doesn't matter), give it a file name
G) open that file in your NLE and begin editing
H) When you're all done you can delete the files as you see fit
The procedure is still rough but its a good start. Here is some sample output.
UPDATE1
Some have had trouble following the instructions for various reasons. I've put together the pieces that don't explicitly disallow bundling. Hopefully this link is still valid when you find this.
http://www.sendspace.com/file/d71x3y
The contents have an installme.bat. Run that to create a c:\capture directory. Inside the 24p directory specified in E-H and J are done. You still have to do the rest manually but it will help get you started if you run into errors.
You may want to read the thread that spawned the above "patch" at http://www.dvinfo.net/conf/showthread.php?t=91500&page=2
UPDATE2
Steve Szudzik consolidated the above process and the improvements in update1. You can find his exe and procedure at http://www.szudzik.net/vegas/scripts/HV20Pulldown.html. Therefore the procedure outlined above is mostly for reference now. If you have problems with Steve's method look to the components that made it work.
fixavsdelay.pl+go.bat, this is replaced by Steve's HV20Pulldown.exe
#!c:\perl\bin\perl.exe
# You can install ActivePERL 5.8 to parse this for you
# This file is fixavsdelay.pl Version 1
# Parse AVS files in directory with proper delay
# by Mike Dulay -- http://yousillyman.blogspot.com
# This code is released under GPL to align with the spirit of the code this works with.  It's free and open source, okay?  Just use it and abuse it.  But any mistakes from here on are you own! :-)

# My template.AVS:
#vid=MPEG2Source("__vid__")
#aud=MPASource("__aud__").delayaudio()
#audiodub(vid,aud)
#TFM(d2v="__vid__")
#tdecimate()

# My go.bat
#COPY template.avs %1
#FOR %%f IN (%1\*.m2t) DO dgindex\dgindex.exe -if=[%%f] -FO=0 -OF=[%%f_] -AT=[%1\template.avs] -EXIT
#FOR %%f IN (%1\*.m2t) DO perl fixavsdelay.pl %%f


sub mstos {
    my $ms = $_[0];
    #preserve the "-" sign if present
    my $sign = "";
    $sign = '-' if ($ms=~/^\-/);
    $ms =~ s/^\-//;
    my $secs = sprintf("%.3f", ($ms/1000));
    return $sign.$secs;
}

my $filename = $ARGV[0];
open(AVSFILE,"<$filename\_\.avs");
open(OUTFILE,">$filename\_fixedaudio\.avs");

foreach my $line () {
  if ($line =~ /DELAY /) {
      my $subline = $';  # part of string after word DELAY
      $subline =~ /ms\.mpa/; # part of string between delay and ms.mpa
      my $delaystring = $`;
      my $seconds=mstos($delaystring);
      $line =~ s/delayaudio\(\)/delayaudio\($seconds\)/;
      print OUTFILE $line;
 } else {
 print OUTFILE $line;
 }
}
close(AVSFILE);
close(OUTFILE);

__END__
rem COPY template.avs %1
FOR %%f IN (%1\*.m2t) DO dgindex\dgindex.exe -if=[%%f] -FO=0 -OF=[%%f_] -AT=[template.avs] -EXIT
FOR %%f IN (%1\*.m2t) DO perl fixavsdelay.pl "%%f"
template.avs, this was my version
vid=MPEG2Source("__vid__")
aud=MPASource("__aud__").delayaudio()
audiodub(vid,aud)
TFM(d2v="__vid__")
tdecimate()
farnsworth.avs, this was Farnsworth's original which Steve also uses as a base
v=MPEG2Source("__vid__")
a=MPASource("__aud__")
audiodub(v,a)
TFM(d2v="__vid__")
tdecimate()
DelayAudio(-0.222)
UPDATE3:
Here's a reference to the HV20 forum where Farnsworth first posted his method.
http://www.hv20.com/showthread.php?t=218&page=13
Eugenia Loli-Queru also posted improvements to Steve's documentation (it's great how the improvements keep rolling).
http://eugenia.gnomefiles.org/2007/07/13/canon-hv20-24p-pulldown/
2 comments:
mike - how to get an progressive target with vegas? tried to render it but still get ghosty looking footage and stutter...cheers
You have to pick a codec like AVI, WMV, or MP4 with a frame rate of 24p in the codec options (this overrides your project settings even if you're set to 23.796).
Post a Comment